Unity Integration Guide
This guide will walk you through the setup process for the Mirror World Smart SDK on Unity.
Getting started
You should have a MirrorWorld developer account,you can register for it at our official site.
Also you need to create project and create an API Key. If you already have an API Key, you may skip this step and proceed to the next one.
Import SDK
Download assets Mirror World Unity SDK.
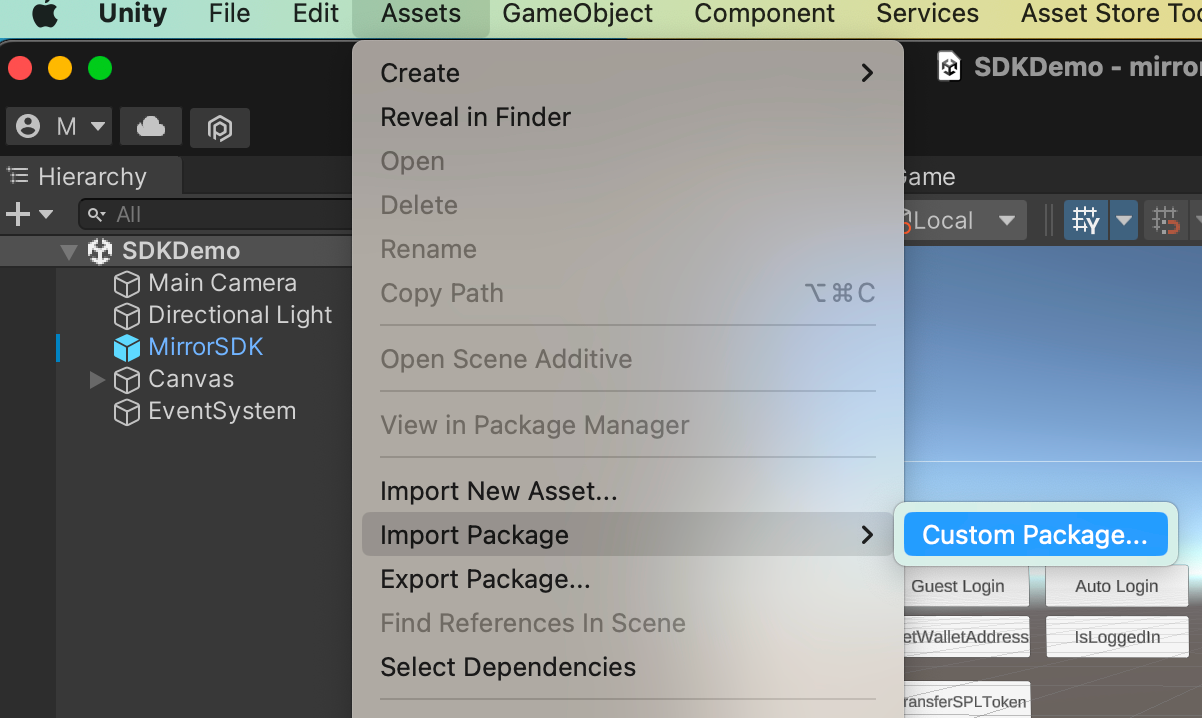
import it to your project Assets > Import Package > Custom Package and select the package you just downloaded.
Usage
Configration
Config with prefab
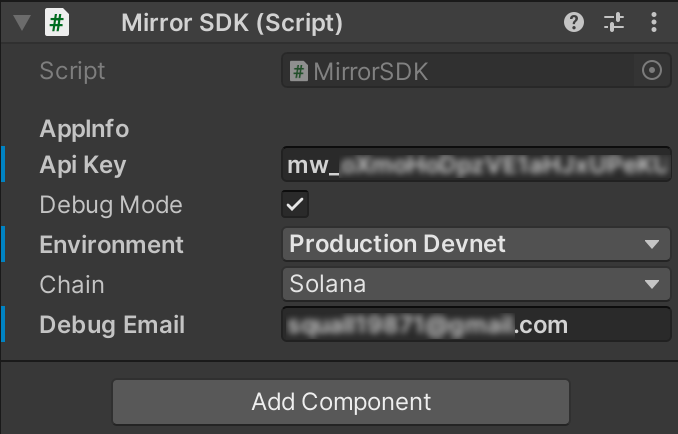
Explanation of beyond image:
- Api Key Input your aky key which requested on https://docs.mirrorworld.fun/ .
- Debug Mode If checking this, you could see all the flow and error notice on console.
- Environment Choose the environment you want to use.
- Chain Which chain you want to work on.
- Debug Email Using for debug. Please input the email which used to register the API key.
Configration dynamic(Not recommend)
If you don't want to add a game object to your scene,you can init Mirror World SDK with the following code:
GameObject mirrorObj = new GameObject("MirrorSDK", typeof(MirrorSDK));string apiKey = "your api key";MirrorChain chain = MirrorChain.Solana;bool debugMode = true;MirrorEnv env = MirrorEnv.Devnet;MWSDK.InitSDK(apiKey, mirrorObj, chain, debugMode, env);
Login
And then,if you want to call some API of SDK in your app,you should lead users to login first.
- Call up login page
If you want him to login(or again), you can use the following code:
MWSDK.StartLogin((loginResponse) => { Debug.Log("Login result:" + JsonUtility.ToJson(loginResponse));});
StartLogin is a client API, so you don't need to concern about chain. But for most API, you need to use different instance on different chain. Normally, they are MWSDK.chain_name. You can refer to our documentation website to find out which functional module each API belongs to.
For convinience, we will use Solana as default at following code.
And if you want to do something after the logining is successful,you can pass an action to it as follows code:
MWSDK.StartLogin((isSuccess)=>{ if(isSuccess){ Debug.Log("Login success!"); }else{ Debug.Log("Login failed!"); }});
- Check if use needs to login. When a user opens your app, you may want to know whether this user has logged in before,instead of letting him login every time, you can call the following code to know that.
MWSDK.IsLoggedIn((isLoggedIn) => { Debug.Log("If he is logged in:" + isLoggedIn);});
Full API Documentation
You can view the documentation for Mirror World SDK for Mobile on our Official Documentation Site
Unity Integration Guide
This guide will walk you through the setup process for the Mirror World Smart SDK on Unity.
Getting started
You should have a MirrorWorld developer account,you can register for it at our official site.
Also you need to create project and create an API Key. If you already have an API Key, you may skip this step and proceed to the next one.
Import SDK
Download assets Mirror World Unity SDK.
import it to your project Assets > Import Package > Custom Package and select the package you just downloaded.
Usage
Configration
Config with prefab
Explanation of beyond image:
- Api Key Input your aky key which requested on https://docs.mirrorworld.fun/ .
- Debug Mode If checking this, you could see all the flow and error notice on console.
- Environment Choose the environment you want to use.
- Chain Which chain you want to work on.
- Debug Email Using for debug. Please input the email which used to register the API key.
Configration dynamic(Not recommend)
If you don't want to add a game object to your scene,you can init Mirror World SDK with the following code:
Login
And then,if you want to call some API of SDK in your app,you should lead users to login first.
- Call up login page
If you want him to login(or again), you can use the following code:
MWSDK.StartLogin((loginResponse) => { Debug.Log("Login result:" + JsonUtility.ToJson(loginResponse));});
StartLogin is a client API, so you don't need to concern about chain. But for most API, you need to use different instance on different chain. Normally, they are MWSDK.chain_name. You can refer to our documentation website to find out which functional module each API belongs to.
For convinience, we will use Solana as default at following code.
And if you want to do something after the logining is successful,you can pass an action to it as follows code:
MWSDK.StartLogin((isSuccess)=>{ if(isSuccess){ Debug.Log("Login success!"); }else{ Debug.Log("Login failed!"); }});
- Check if use needs to login. When a user opens your app, you may want to know whether this user has logged in before,instead of letting him login every time, you can call the following code to know that.
MWSDK.IsLoggedIn((isLoggedIn) => { Debug.Log("If he is logged in:" + isLoggedIn);});
Full API Documentation
You can view the documentation for Mirror World SDK for Mobile on our Official Documentation Site
GameObject mirrorObj = new GameObject("MirrorSDK", typeof(MirrorSDK));string apiKey = "your api key";MirrorChain chain = MirrorChain.Solana;bool debugMode = true;MirrorEnv env = MirrorEnv.Devnet;MWSDK.InitSDK(apiKey, mirrorObj, chain, debugMode, env);